Your workspace
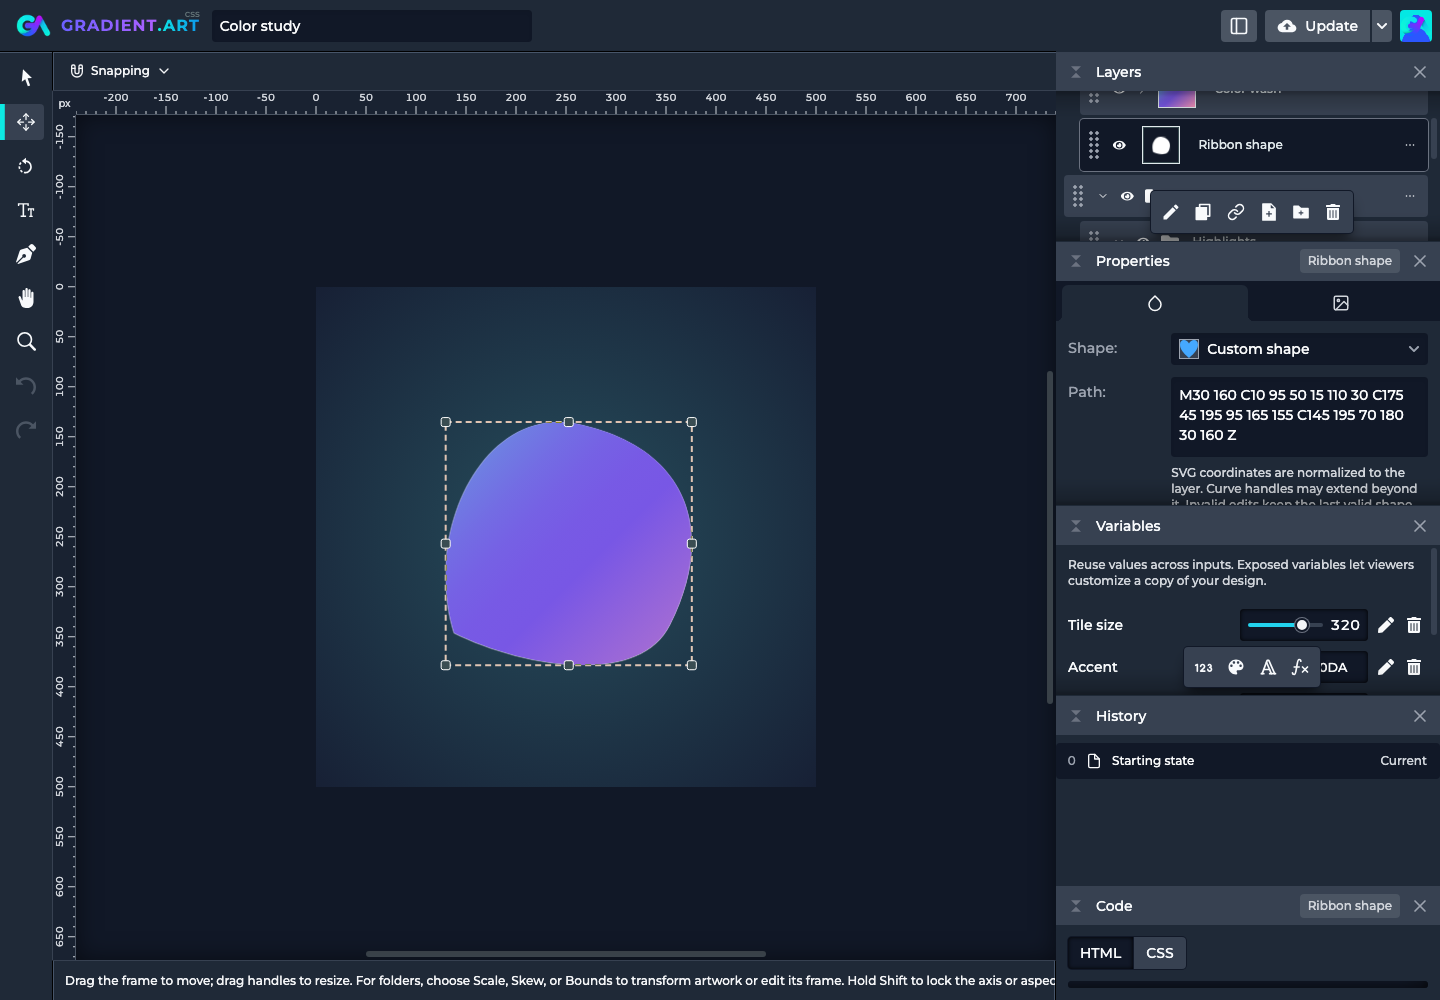
A little orientation goes a long way. GradientArt puts your design in the middle, tools on the left, and the details on the right. You can move between the big picture and the small adjustments without leaving the canvas.
Think of it as three steps: pick something to work on, choose a tool, then fine-tune the result. You don't need to learn every control before making your first design.
Start simple. A single gradient is enough to get a feel for the workspace. Add more layers when you want more depth.
The project header
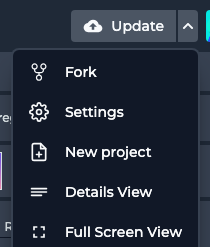
The header is home to the project name and the actions that manage the whole design. Click the name to rename your current design. The main action button shows Save, Update, or Fork; its Project actions arrow opens the other available actions. Settings holds the description, tags, and canvas dimensions.
Save creates a project; Update saves changes to one you own; Fork makes a separate version of an existing project. After saving, Details View opens the presentation page and Full Screen View shows the artwork without editor controls. New project starts a blank canvas.
These actions depend on whether the project is new, saved, or yours. See Saving and sharing before closing a design you want to keep.
The left toolbar
The toolbar is where you choose how to interact with your design. Transform and rotate tools help you place things; pan and zoom let you take a closer look without changing the artwork itself.
Path tool edits shape geometry, and Text tool edits text directly on the canvas. Select an existing shape or text layer first to edit it. If the current selection isn't the matching type, these tools create a new matching layer. The exception is a selected Guides layer: the pen stays on that layer and adds a guide with a click-and-drag gesture. The press position sets its origin, and the drag direction sets its angle. See Guides. No Tool clears the tool overlay when you just want to look at the artwork.
Measure checks distances and angles between shape vertices, straight edges, and construction guides without changing your design. See Measuring distances and angles for examples.
Choose a tool
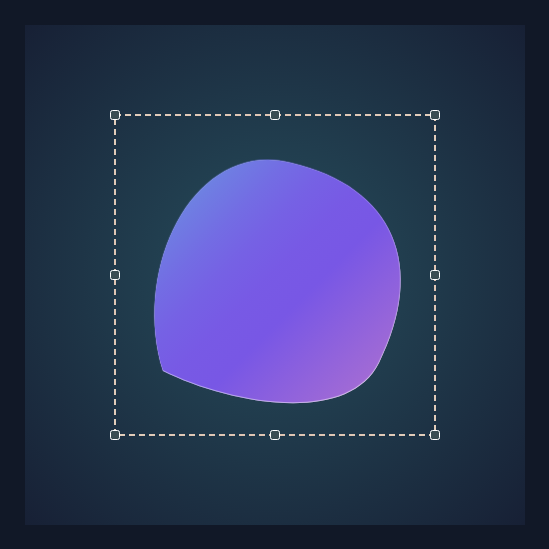
Try selecting a layer and switching to Transform. The controls on the canvas let you work visually, while the properties panel gives you a place for precise values. Both are ways of working on the same design.
Measuring distances and angles
Choose Measure in the left toolbar, then click an item on the canvas. Select a second item when you want to compare two positions or lines. You can select vertices and straight edges from visible shape layers, or lines from visible Guides layers. The two items can belong to different layers; you don't need to select their layers first. Curved edges aren't selectable, but their endpoint vertices are. Layer frames and artboard edges aren't measuring targets.
Selected items highlight in cyan. The result appears directly on the canvas in
artwork pixels (px) or degrees (deg), rounded to two decimal places. Zoom
changes the view, not the measurement. Very small nonzero results display
<0.01 px or <0.01 deg.
One straight shape edge shows its segment length, measured between its endpoints. Selecting a second item replaces that length with the corresponding distance or angle comparison. A single vertex or guide doesn't show a result; guides are infinite lines and have no finite length.
Two vertices show the straight-line distance between their positions.
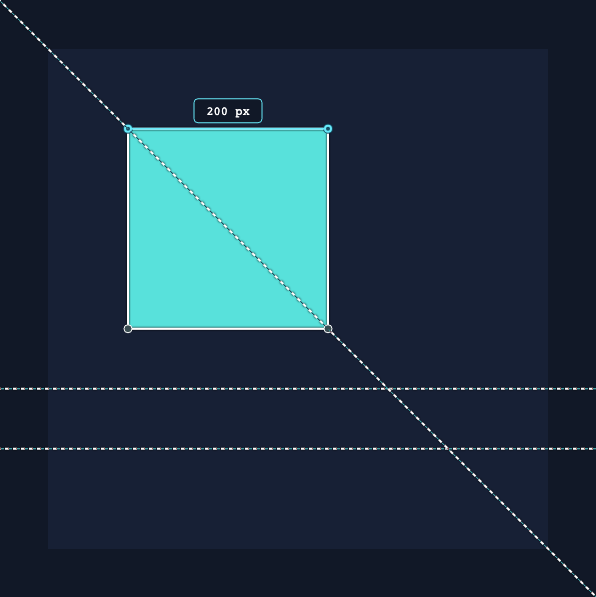
A vertex and a straight edge or guide show the perpendicular distance to the line. Shape edges are treated as extended, infinite lines: if the perpendicular falls beyond an endpoint, you still get the distance to that line, not to the nearest endpoint.
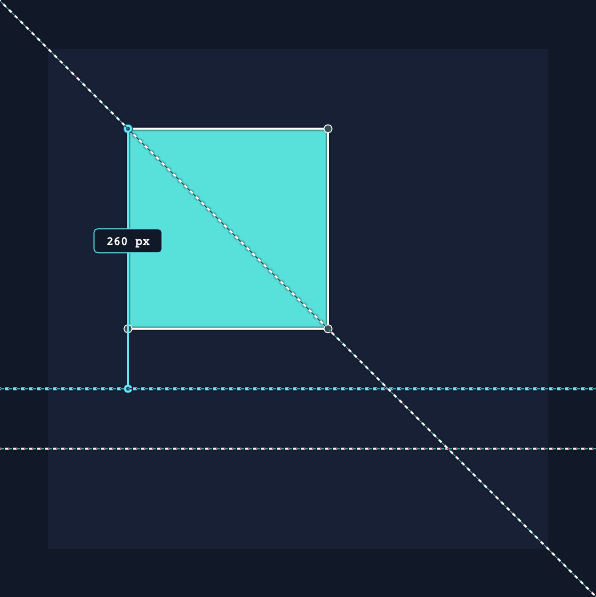
Two parallel edges show their perpendicular separation, not the distance between their endpoints. The same rule applies to an edge and a parallel guide.
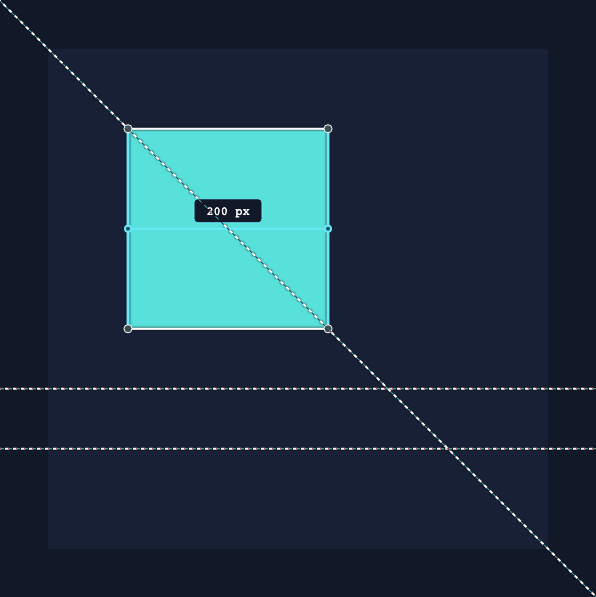
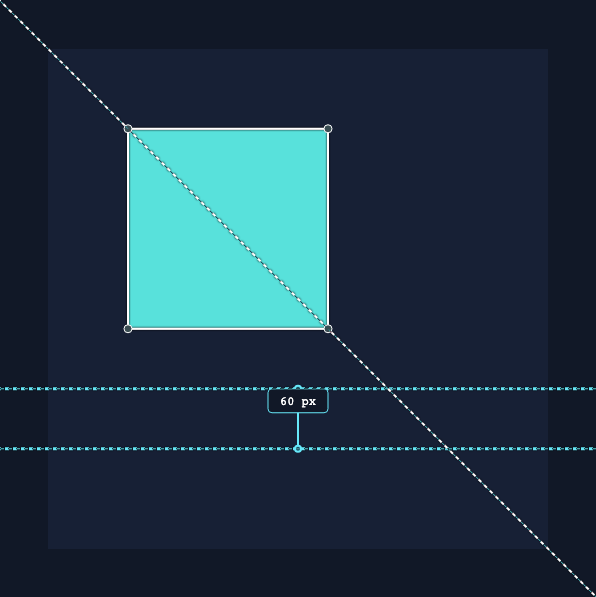
Two guides work just like two straight edges. Each copy in a guide's spread pattern is independently selectable for measuring, even though moving or rotating a guide edits its whole pattern. You can also select guide lines outside the artboard. Hidden guides, hidden layers, and guides inside hidden folders aren't measuring targets.
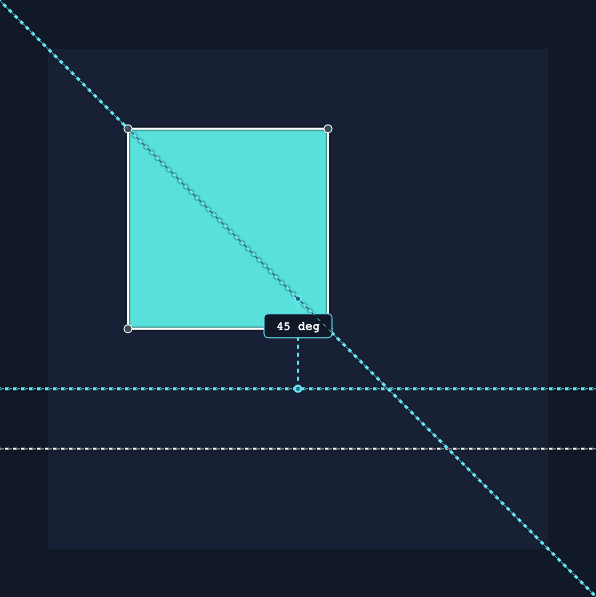
Two nonparallel lines show their smaller unsigned angle, from 0 to 90 degrees, instead of a distance. This applies to two shape edges, an edge and a guide, or two guides.
Only two items can be selected at once; clicking a third doesn't replace either selection. Click a selected item to deselect it before choosing another, or use Clear measuring selection in the top bar, click empty workspace, or press Escape to clear both. Keyboard users can focus an item and press Enter or Space to select or deselect it. Switching to another tool clears all measuring selections.
Measuring doesn't move or edit shapes or guides. Selections and results aren't saved with the project or included in undo history.
Undo and redo
Use Undo and Redo in the left toolbar to step backward and forward through your edits. The shortcuts are Command+Z and Command+Shift+Z on Mac, or Ctrl+Z and Ctrl+Shift+Z elsewhere.
While editing a path, Undo and Redo work through that path-editing session. Cancel discards its draft; switching tools commits a valid path. Text has Done instead, and its valid edits apply as you type. The Layer types guide covers each tool's finish behavior.
The top and bottom bars
The bar above the canvas follows the tool you're using. Look here for its options rather than searching through every panel.
The bottom bar offers instructions for the current tool. If you're not sure what to drag, click, or press next, it's a good place to look.
Keep these two bars in mind as a pair: the top helps you adjust the tool, and the bottom helps you use it.
The main canvas
This is where your artwork comes together. Use the canvas to judge the whole composition, then zoom in when you want to work on a smaller detail.
Panning changes your view of the workspace. Zooming changes how large it looks on screen. Neither is a replacement for changing the actual size of your artwork.
Choose Pan and drag to reposition the view. Choose Zoom in/out for the zoom controls in the top bar; Reset zoom returns to 100%. To resize the actual design, change Canvas size in Settings.
Pinch or spread two fingers on your trackpad over the canvas to zoom out or in, with any tool selected. The point under the cursor stays in place. Zoom ranges from 25% to 500%; ordinary two-finger scrolling still pans the view.
Keep the big picture in view
After a few close-up adjustments, zoom out again. It's easier to judge spacing, balance, and the relationship between layers when you can see the full design.
Rulers and guides
The top and left rulers measure artwork pixels from the canvas's top-left corner: zero at the origin, increasing to the right and down. The markers follow your cursor. Panning keeps the rulers aligned with the artwork; zooming adjusts their spacing. At 100%, ticks mark every 10 pixels and labels every 50; at 200%, they mark every 5 and 25 pixels.
Add a Guides layer from the Layers menu instead of dragging from a ruler. In Properties, add or remove guides and edit their position, angle, count, spacing, and angular spread. Each numeric value can use a variable or formula. You can have multiple construction layers, including inside folders. Select a Guides layer, then click an individual line or its heading in Properties. Transform moves that guide; Rotate turns it around its origin. Spread copies always move and rotate together as one pattern. These edits update Properties and support undo; only the numeric bindings you change are replaced.
Guides are infinite dashed lines with contrast against the background. They stay aligned while panning and zooming and never intercept path editing gestures. They are saved in projects, local drafts, and editable JSON, and participate in undo history, but are omitted from generated CSS, HTML, and images. Hide a guide layer or its parent folder to hide its guides and remove their snapping targets. See Guides for spread controls.
Open Snapping in the Path tool's top bar to choose snap targets independently: Guides, Document center, Document edges, Other shape vertices, and Other shape edges. All types start enabled. Shape edges follow the actual paths, including curves, rather than bounding boxes. Hidden shapes and the currently edited shape (including its linked clones) are excluded. Guide snapping includes angled lines and nearby guide intersections.
New and dragged vertices snap within six screen pixels at any zoom. Turn off every checkbox to disable snapping entirely. Choices are retained when switching tools or layers during the editor session, but are not saved in the artwork or included in undo history. Keyboard nudges remain precise, unsnapped movements.
The Transform (move) tool has its own Snapping dropdown: Document center, Guides, Document edges, Other folders, and Other layers. Document center, guides, and document edges start enabled; other folders and layers start disabled. Folder and layer targets use their visible frame edges and centers. Move snapping uses horizontal and vertical construction guides; angled guides are targets for Path vertices. Hidden items, the moving selection, linked occurrences that move with it, and their containing folders are excluded. Multiple selected items snap as one group.
Move snapping uses the same six-screen-pixel tolerance and session-only preferences, independent of the Path tool. Turn off every option to move without snapping. Shift still locks the movement axis; keyboard nudges and resize handles keep their existing behavior.
The Rotate tool has a separate Snapping dropdown with Off, 90 deg, 45 deg, 30 deg, and 15 deg. Choose one increment to snap dragged rotations to its nearest multiple. This works for layers, folders, multi-layer selections, and individual guides, including dragging a guide line. Snapping starts off and is remembered when switching tools or selections during the editor session, without changing project data or undo history. Arrow-key nudges remain precise one-degree adjustments.
The right-hand panels
The right side brings together Layers, Properties, Variables, History, and Code. Each has a different job, so you can move from arranging the artwork to refining it.
- Layers helps you choose and organize the pieces of your design.
- Properties shows the controls for what you've selected.
- Variables lets you connect values across your design.
- History lets you jump backward and forward through edits.
- Code gives you a view of the generated output.
Drag a panel header to redistribute vertical space, or use its collapse button to tuck it away. Drag the left edge of the panel area to change its width. To hide a section completely, click the X in its header, or open Sidebar sections in the editor header and uncheck it. Use that menu to bring it back, even if you've hidden every section. Section visibility, relative heights, and collapsed sections are remembered in this browser across reloads and projects; they don't change the artwork or its undo history. The remaining panels share the available space and can still be resized or collapsed.
Inside Code, use the HTML / CSS toggle above the generated source to switch languages. The px / % toggle appears beside it when CSS is selected. These controls stay visible while the generated source scrolls beneath them. Code shows the active layer, or the active folder and its descendants. The badge in the section header names that layer or folder. With multiple layers selected, Code follows the last selected item. Click a selected layer or folder to deselect it, or click empty space in Layers to clear the selection and see the entire project's code. The preview keeps the canvas dimensions and the selected item's own settings, without including its parent folders or siblings. Clipping to a sibling is omitted for the selected item; clipping between descendants inside a selected folder is preserved.
The editor's right-hand panels are intended for a wider viewport; use a desktop or tablet-sized window when you need the full editing workspace.
History
Select any entry in History to restore that state. Current marks where you are, and Redo marks later states you can return to. The panel shares the same history as the toolbar's Undo and Redo buttons and their keyboard shortcuts. Each entry's icon identifies the affected layer type or folder; hover over it for the type name. Edits affecting different types use a shared layers icon. Labels name the operation, such as Move gradient layer, Resize text layer, or Rotate folder. Path operations keep their labels when the path is committed. Making a new edit from an earlier state replaces the redo states.
While the Path tool is editing a shape, History shows its individual vertex, curve, and path operations, including edits you have undone. Finish the path by switching tools to return to project history, or use Cancel to discard the path draft. Committed path edits remain individually undoable in project history.
History keeps up to 100 undo steps; Starting state is the earliest state still available. Opening another project, starting a new one, or reloading the page starts a fresh history. Saving does not clear the current session's history.
For now, start with Layers and Properties. Select a layer, change a value, and watch what happens on the canvas. When you're ready to build a richer composition, get to know layers.